Embedded Programming
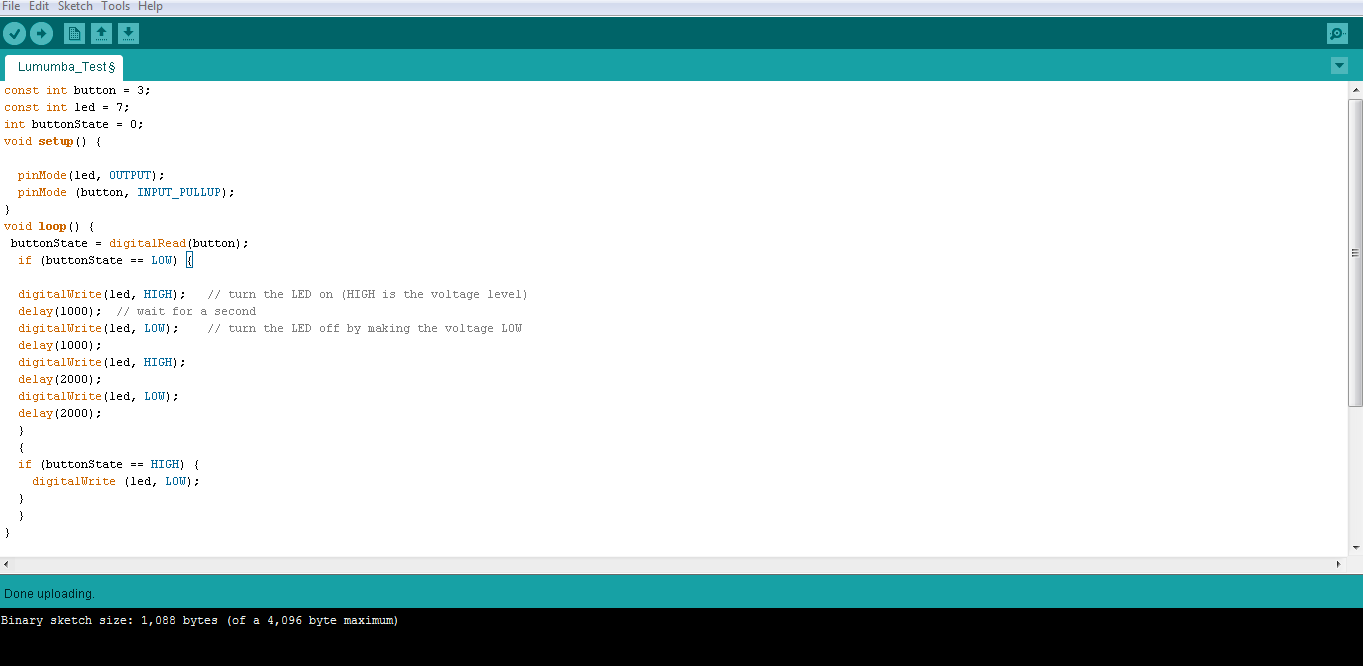
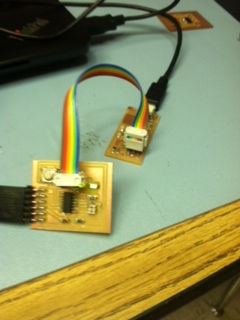
This week we focused on programming our boards from our electric design project. I used my fab.isp board from the electronic production week to program my board.
First, I set up a a development environment by downloading and installing the Arduino integrated development environment (IDE). After the environment and directories were set up, I connected my fabISP programmer to my revised Echo Hello World board.
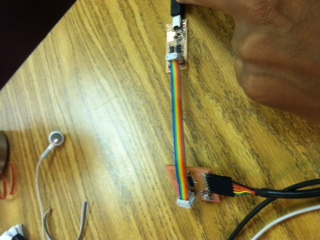
I had a few problems with my original Hello World board, and I actually had re-solder part of the and add wire some parts where the copper had been damaged due to reworking of the board. I actually saw that a piece of wire that had been obscured was causing a shorting connection between two components of my board. I discovered this through using an oscilloscope in order to measure the variation in voltage between my reset pin and the resonator connected to my LED. After working out all of the connections, though, I was able to go into the Arduino IDE. I used Arduino's standard programs for blinking and button in order to test my board's button and LED...and they both worked!
After checking to make sure that my LED and button work, I used arduino in order to program it to do something a little different. I drew inspiration from two of the example programs in the Arduino library -- "Button" and "Blink" -- in order to program my board. I made my LED blink for one second, cut off for one second, blink for two seconds, and then cut off for two seconds--all while pressing the button. When I did not press the button, the LED stayed off. I did not use a resistor between my button and the microcontroller because the microcontroller already has a built in pullup resistor. In order to make sure the code did what I wanted it to do, I added "_pullup" in the command line where I designated the button as an input.